What is Necropolis?
Necropolis is a 28mm tabletop skirmish wargame designed by Peter Vigors. The game is set in a fantasy world called the Endless City where undead warriors and dark magic vie for control of a ruined civilization. Players create small warbands of 3-5 models and battle on uniquely small 16inch by 16inch boards. Peter encourages players to get creative and build the game boards as scenic diorama pieces adding to the delightful narrative styling that every part of the game exudes. Currently the game rules are available for free on the community’s Discord channel (a very welcoming space!) with work underway to publish the rules as a book. If you would like to learn more about this game check out the links below!
- Necropolis Patreon
- Peter Vigors on Instagram
- In-depth overview of the game
- Invite to the Discord community
About this project
This project was my entry for the first community kit-bash competition in support of Necropolis. The competition was open to anyone who wanted to enter. Each entrant could choose between building an Undead Sellsword or a Monstrous Horror and rolling dice against a few attribute tables to determine the prompt for their creation.
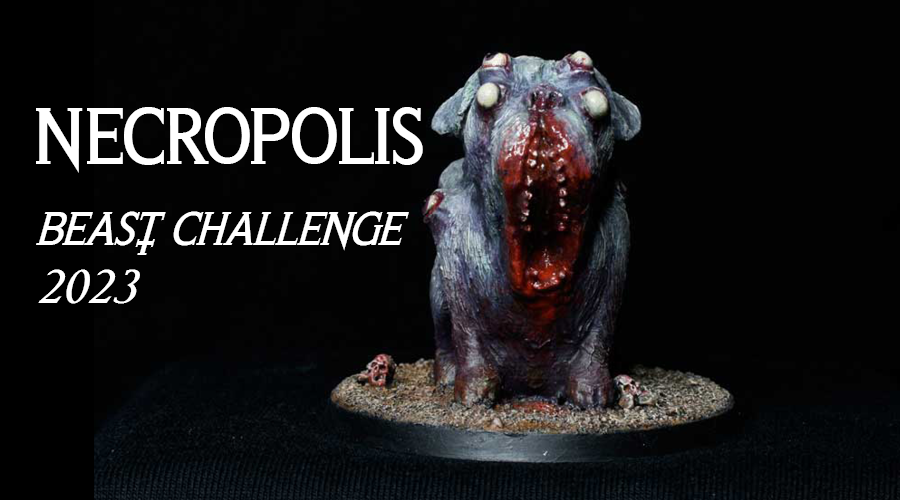
For my own entry I rolled an 8/1/10 which translated to “gloaming/beast/consuming all in its path”. Rummaging around my bitz bin I found a cast-off 3d print of a pug from a friend when they were setting up their printer. The model is a bit large compared to the 28mm scale miniatures typically used in tabletop games but this would work perfectly to create a monster sized beast. My goal was to focus the model around some kind of horrible mouth and then give it an unsettling undead look. You can read some of my notes on making this model farther down the page.
“A heavy breath rattles in the darkness. Softly squelching, something large drags itself towards you, bones cracking underfoot. Then you see the maw, distended and dripping, unseeing eyes search the dim light of the endless city for its next meal. The beast turns away, a hundred bulging eyes protrude from its back – it knows you are there.”


Process Work

- The model was placed onto its final base size early in the process. For this size of model I used a spare 60mm round base. I used 2mm styrene sheet to lift the model up off the base. This gives me space for the basing material, to be added in a later stage, and makes the model look like it is sitting on top of the ground.

2. All of the eyes and the mouth were sculpted with Greenstuff, a two part epoxy putty, over several days to build up the details. I didn’t worry about getting a smooth transition between the 3d print surface (in pink) and the Greenstuff since it will be easily resolved in the next stage.

3. In this view we can see sand has been added to the base, as well as some extra skull details. The teeth in the pug’s mouth were made out of 1mm styrene rod. I drilled small holes in the mouth then, using superglue, placed the rod and trimmed to the correct length.
4. The white surface texture visible in the photo is what I referred to earlier in stage 2. The product I used is called Liquitex Flexible Modeling Paste. It is an acrylic gel medium made of marble dust which dries to a hard finish. It is used to create thick 3d effects mimicking the look of built-up oil painting. How I use it here is to thin the paste out with water and use many thin coats to fill in all the 3d printed layer texture and smooth out any gaps between the sculpted Greenstuff details and the base model.
5. Once the whole model had a cohesive surface I again used the Liquitex paste but this time in a thicker application and, with a coarse paintbrush, created the layered fur texture seen above.

6. To paint the model I used a combination of Citadel model paint, Vallejo model colour, and cheap craft acrylics. I used mainly drybrushing techniques and relied on many thin washes to get a layered look. Finally the whole model received a heavy coat of matte varnish to protect against wear and mute the colours, and the eyes and mouth all got touched up with a glossy varnish.
